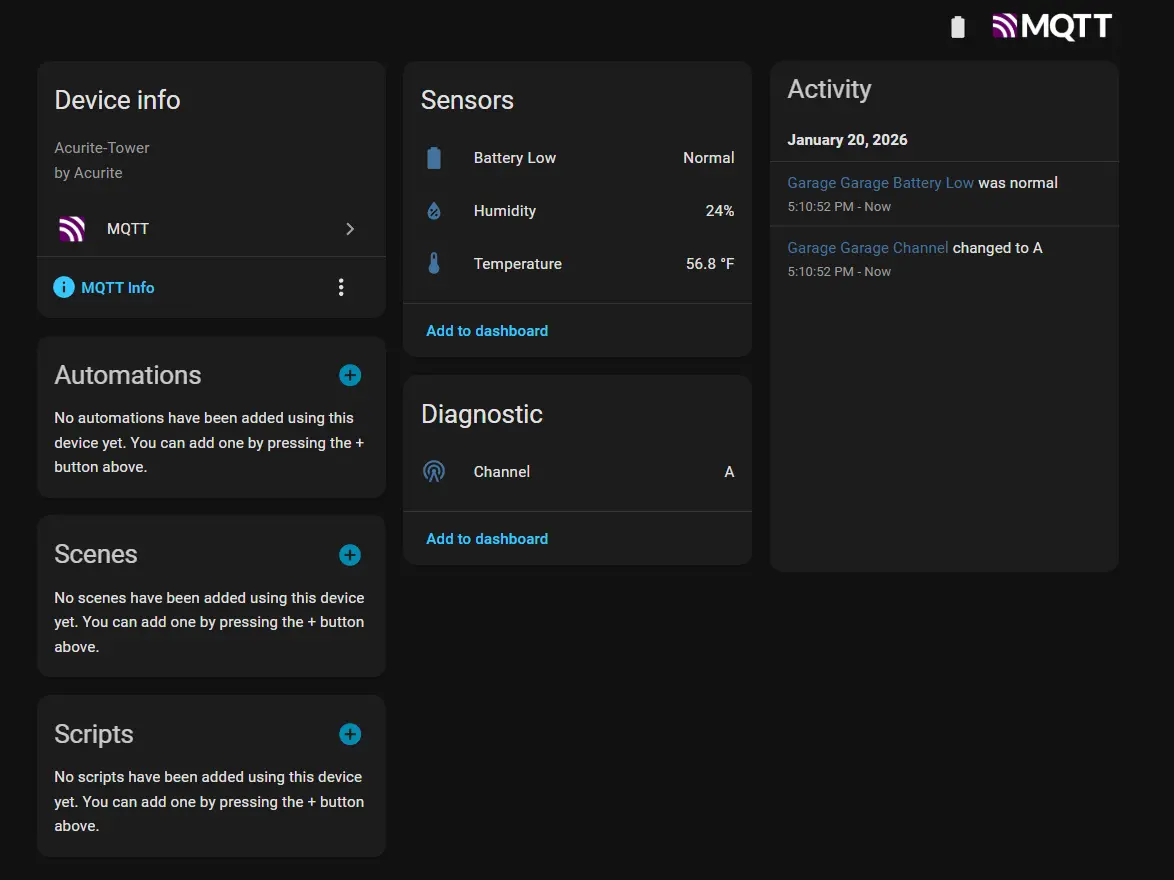
Proxmox - Coral TPU USB Passthrough
This is a very short guide, on passing a USB Coral TPU through to a Proxmox VM.
Interested in home automation? Here are a few of the prime day deals I would personally recommend.
Note, this is not a kitchen-sink post full of non-relaxant links, but, rather, a list of things I have hands on experience with.
Every single product linked below, will work with Home Assistant, 100% LOCALLY, without any required cloud services or subscriptions.
If, you need reasons as to why required cloud services are bad, see Reasons to avoid cloud products
My wife presented me with a unique challenge recently.
"The cats keep getting on top of the kitchen table, and getting hair everywhere!"
So- the logically minded person I am- I decided to build a home-assistant integrated device for keeping cats off of the table!
I present to you, the FADD. Feline Area Denial Device!
Around a year and a half ago, I installed a Pioneer Mini-split and integrated it with Home Assistant
I used a local integration, which had a cloud dependency for the initial setup. And, since installation, it has been working flawlessly.
However, last week, it completely stopped working and I was unable to reinitialize it.
So- Today- I will be replacing the midea dongle, with a device running esphome.
In an effort to monitor the consumption of everything- I ran across an unusual problem.
When connecting my core switch to a ESPHome flashed smart switch, I noticed two things-
So, I set out to see how I could customize my configuration to be suitable for managing my core switch.
I will be implementing:
Everyone wants to monitor energy consumption. Everyone wants to automate their home.
The Sonoff S31, is a pretty low-cost way of doing this.
This is a very quick post on how to take a sensor- such as sensor.grid_power
and split it into sensor.grid_power_in
and sensor.grid_power_out
.
This can be handy if you need a separate sensor for energy/power in, and energy/power out.
For this short post, I will be splitting sensor.battery_power
into sensor.battery_power_in
and sensor.battery_power_out
This is a quite guide on creating a real-time sankey diagram to show your current energy usage.
Tonight, I wanted to do a small, random side-project. I automated the galaxy!
(Or, at least a small version of it.)
Creating simple sensors to determine if we are "at work". Includes setting up a work_days sensor, time of day sensor, and a template sensor to tie everything togather.
As well, includes steps for handling vacation / OoO days, and holidays.
Using a Tp-link kasa HS300 as a low-cost switchable PDU. This product has features for per-outlet power monitoring as well.
On this blog / my house, I try to use 100% local control products whenever possible. Many people don’t understand the reasoning behind this…. So, I am dedicating this page to reasons as to why you should ONLY buy products which are 100% local control only, with no cloud dependency, and no proprietary hub.
A quick post going over the best options for taking advantage of home assistant's energy monitoring features.
To note- you don't have to use home assistant with these products. But, these products were specifically chosen due to some level of integration with home assistant.
The default directions for installing doors sensors, involves using the included double-sized tape directly stick the sensor to doors and windows.
I personally, wanted these sensors to be out of sight, and out of mind. So, I decided to recess them into the doors themselves.
So, you want to have an alarm for your house. But, you don’t want to give your money to ADT/Ring/SimpliSafe/etc… and you want to build it yourself, with components you can easily service and replace, right? If so, this is the article for you.
I have a few Reolink cameras. Recently, I noticed the time of many of the cameras was not set correctly.
Since, I keep all of my IOT and Security devices isolated from the internet, they are not able to communicate with the pre-defined external NTP server. However, I do have a NTP server running on my opnsense firewall which they do have access to.
But, it appears the ability to set a custom NTP server no longer exists in the reolink’s configuration page.
This is a simple review, with a few steps for the First Alert Z-Wave CO/Smoke detectors.
A while back, after converting my primary thermostat over to z-wave, I found a creative way of managing my thermostat’s schedules using the scheduler-card.
Well, I recently installed a new mini-split for my bedroom/office, and needed to integrate and maintain my schedules via home assistant. So, I decided to redo my schedules a bit.
I found the scheduler-card has a “make-scheme” button, which is far more intuitive for creating schedules then what I put together in PART 1. In hindsight, this feature existed then as well…
The goal of this article, is to simplify everything as much as possible. Simpler automation, is more reliable automation generally.
My house has had a Emerson Sensi thermostat for the last 6 or 7 servers. While, this thermostat has served its purpose, and worked reliably (locally), I have had the ongoing issue of having to integrate it into my Home Assistant by using it through the Smart Things Integration. This cloud integration randomly stops working, and does not give very much warning regarding its status.
Normally, this wouldn’t be a huge issue, but, a few years back, I automated my fireplace. So, my fireplace will kick on during the day, to avoid heating the entire house, saving energy. Since, the fireplace bases its temp on the MAIN thermostat located in the center of the house, its important to have somewhat accurate details.
So, I have decided to upgrade both the fireplace, as well as my thermostat, to leverage z-wave.