Home Solar Project - Removal
Continuation (and conclusion) of the home solar project. As the house was sold in Q4 2025, the system had to come down. This post walks through the removal — roof, garage, and exterior — and what's happening to the hardware next.
The Hail Storm
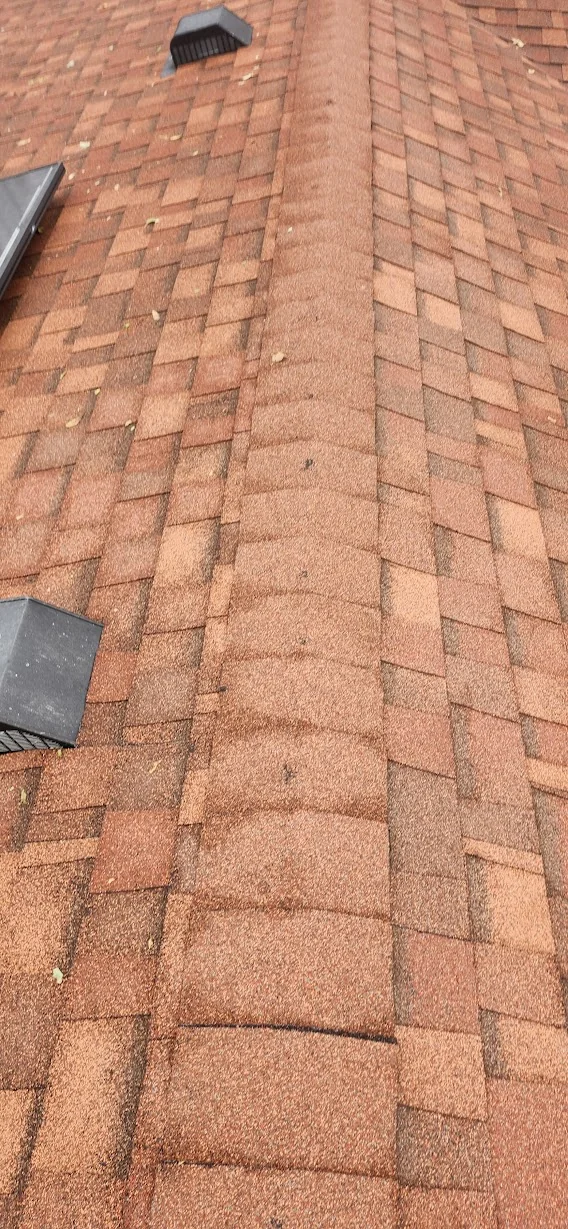
Shortly before I moved in Q4 2025, a pretty decent hail storm hit my house.
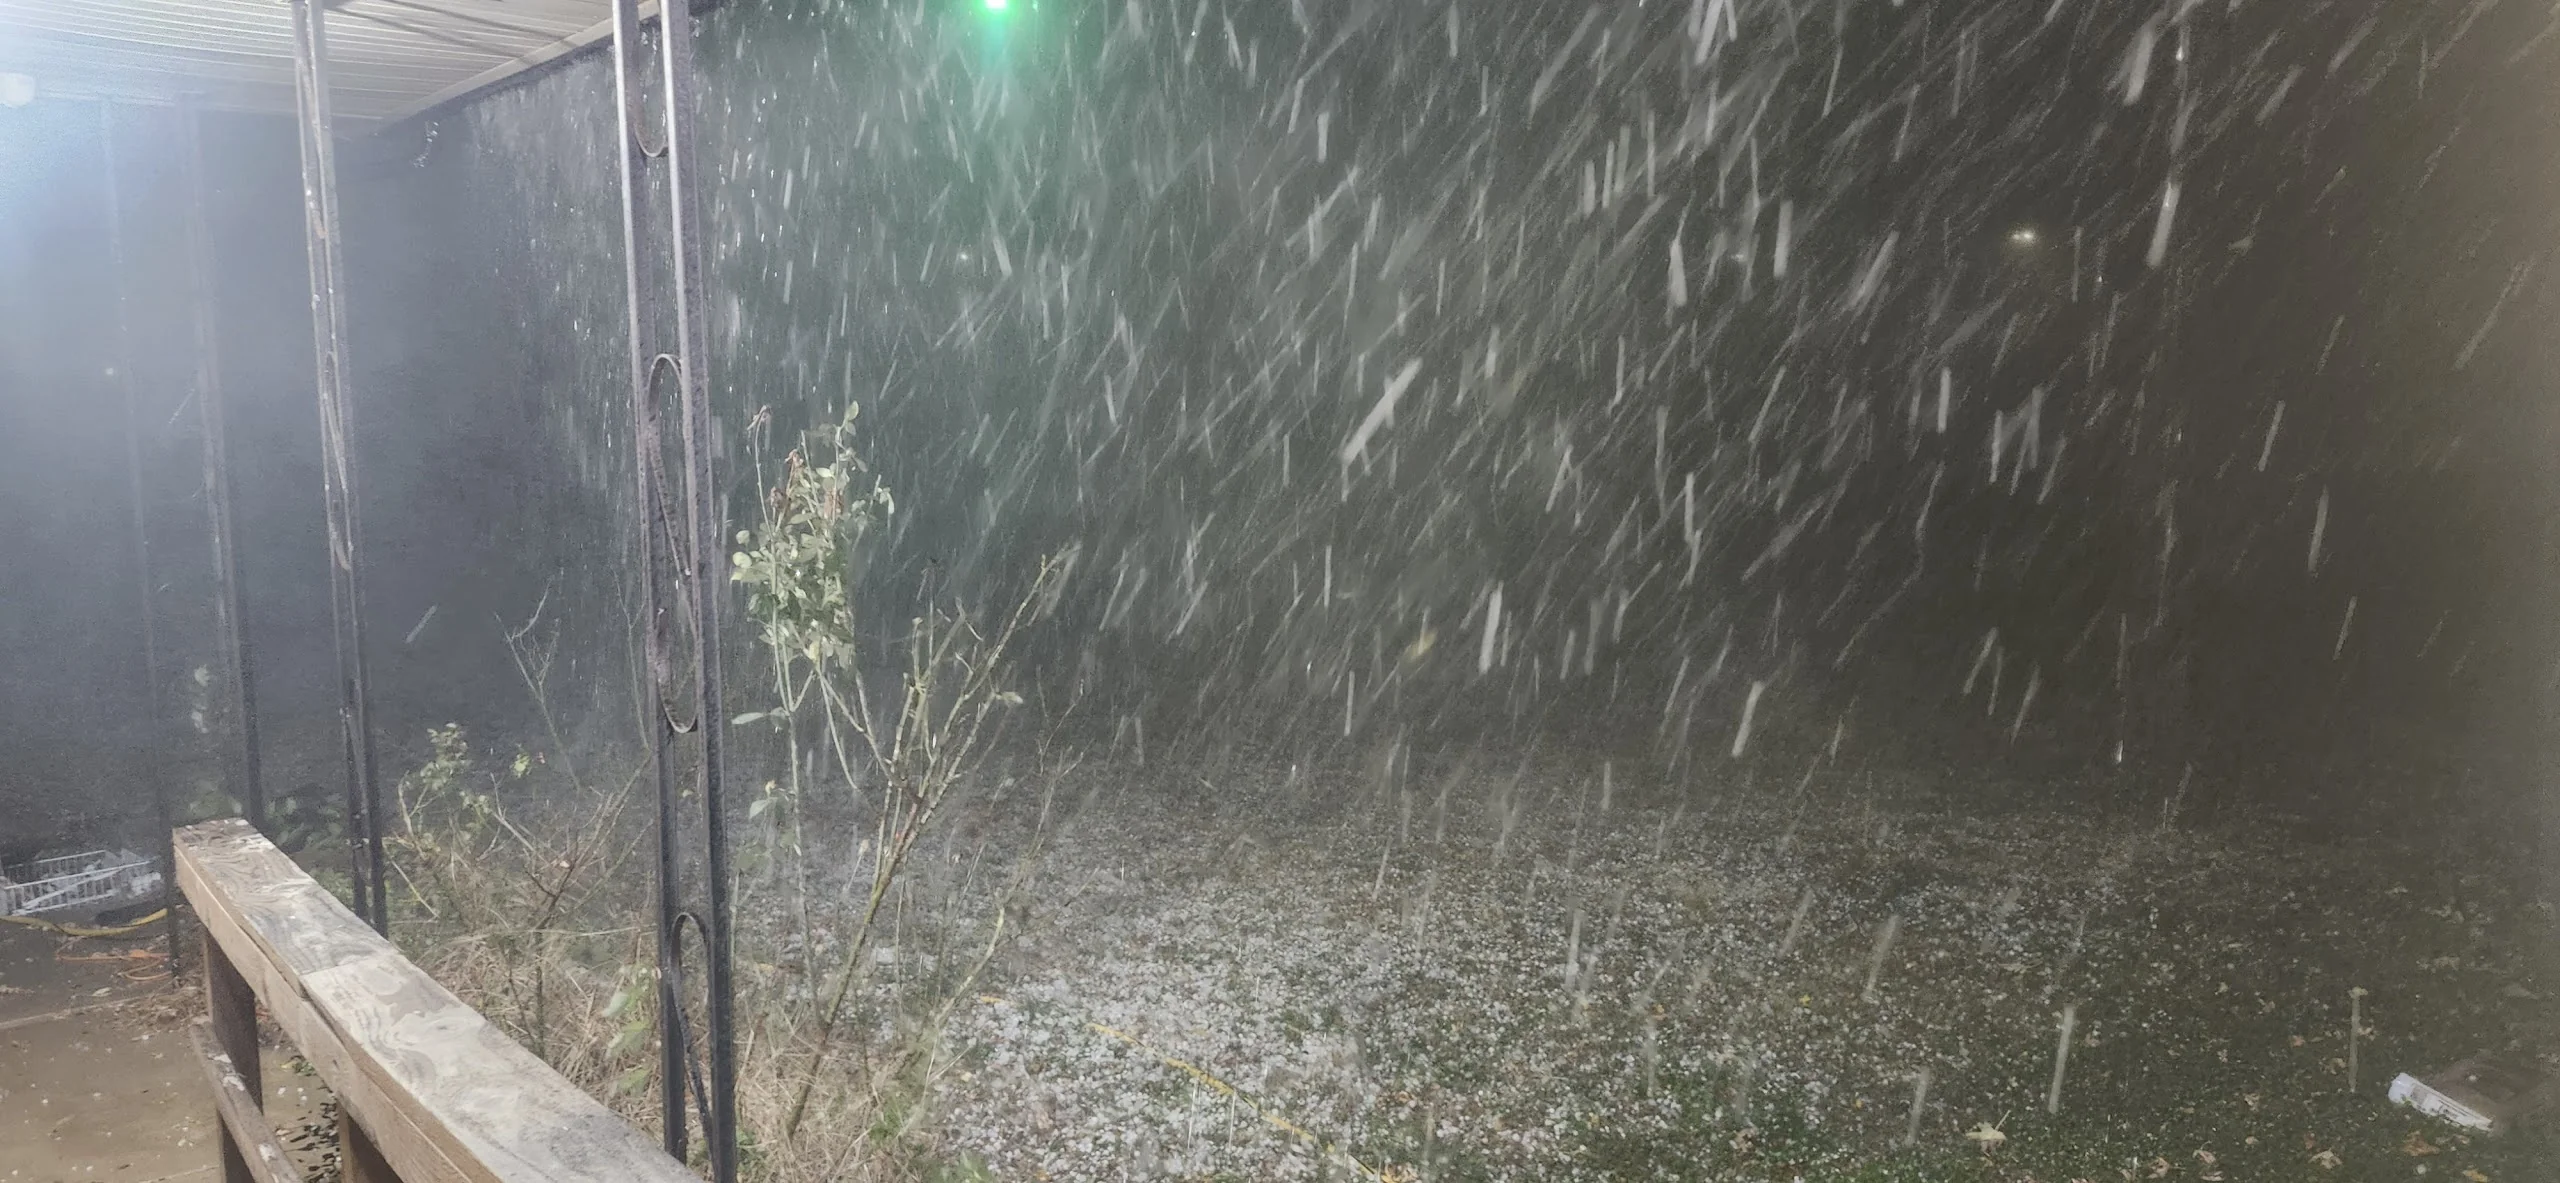
Which caused quite a bit of damage to the roof.
Removing the Panels
For the roof to be replaced, I needed to remove all of my solar panels.
This process was honestly pretty easy. Just unbolt the panels, and remove the cables.

After everything was removed, the roof was an even bigger mess than it was before. But, remember — I am taking these down so the roof CAN be properly replaced.
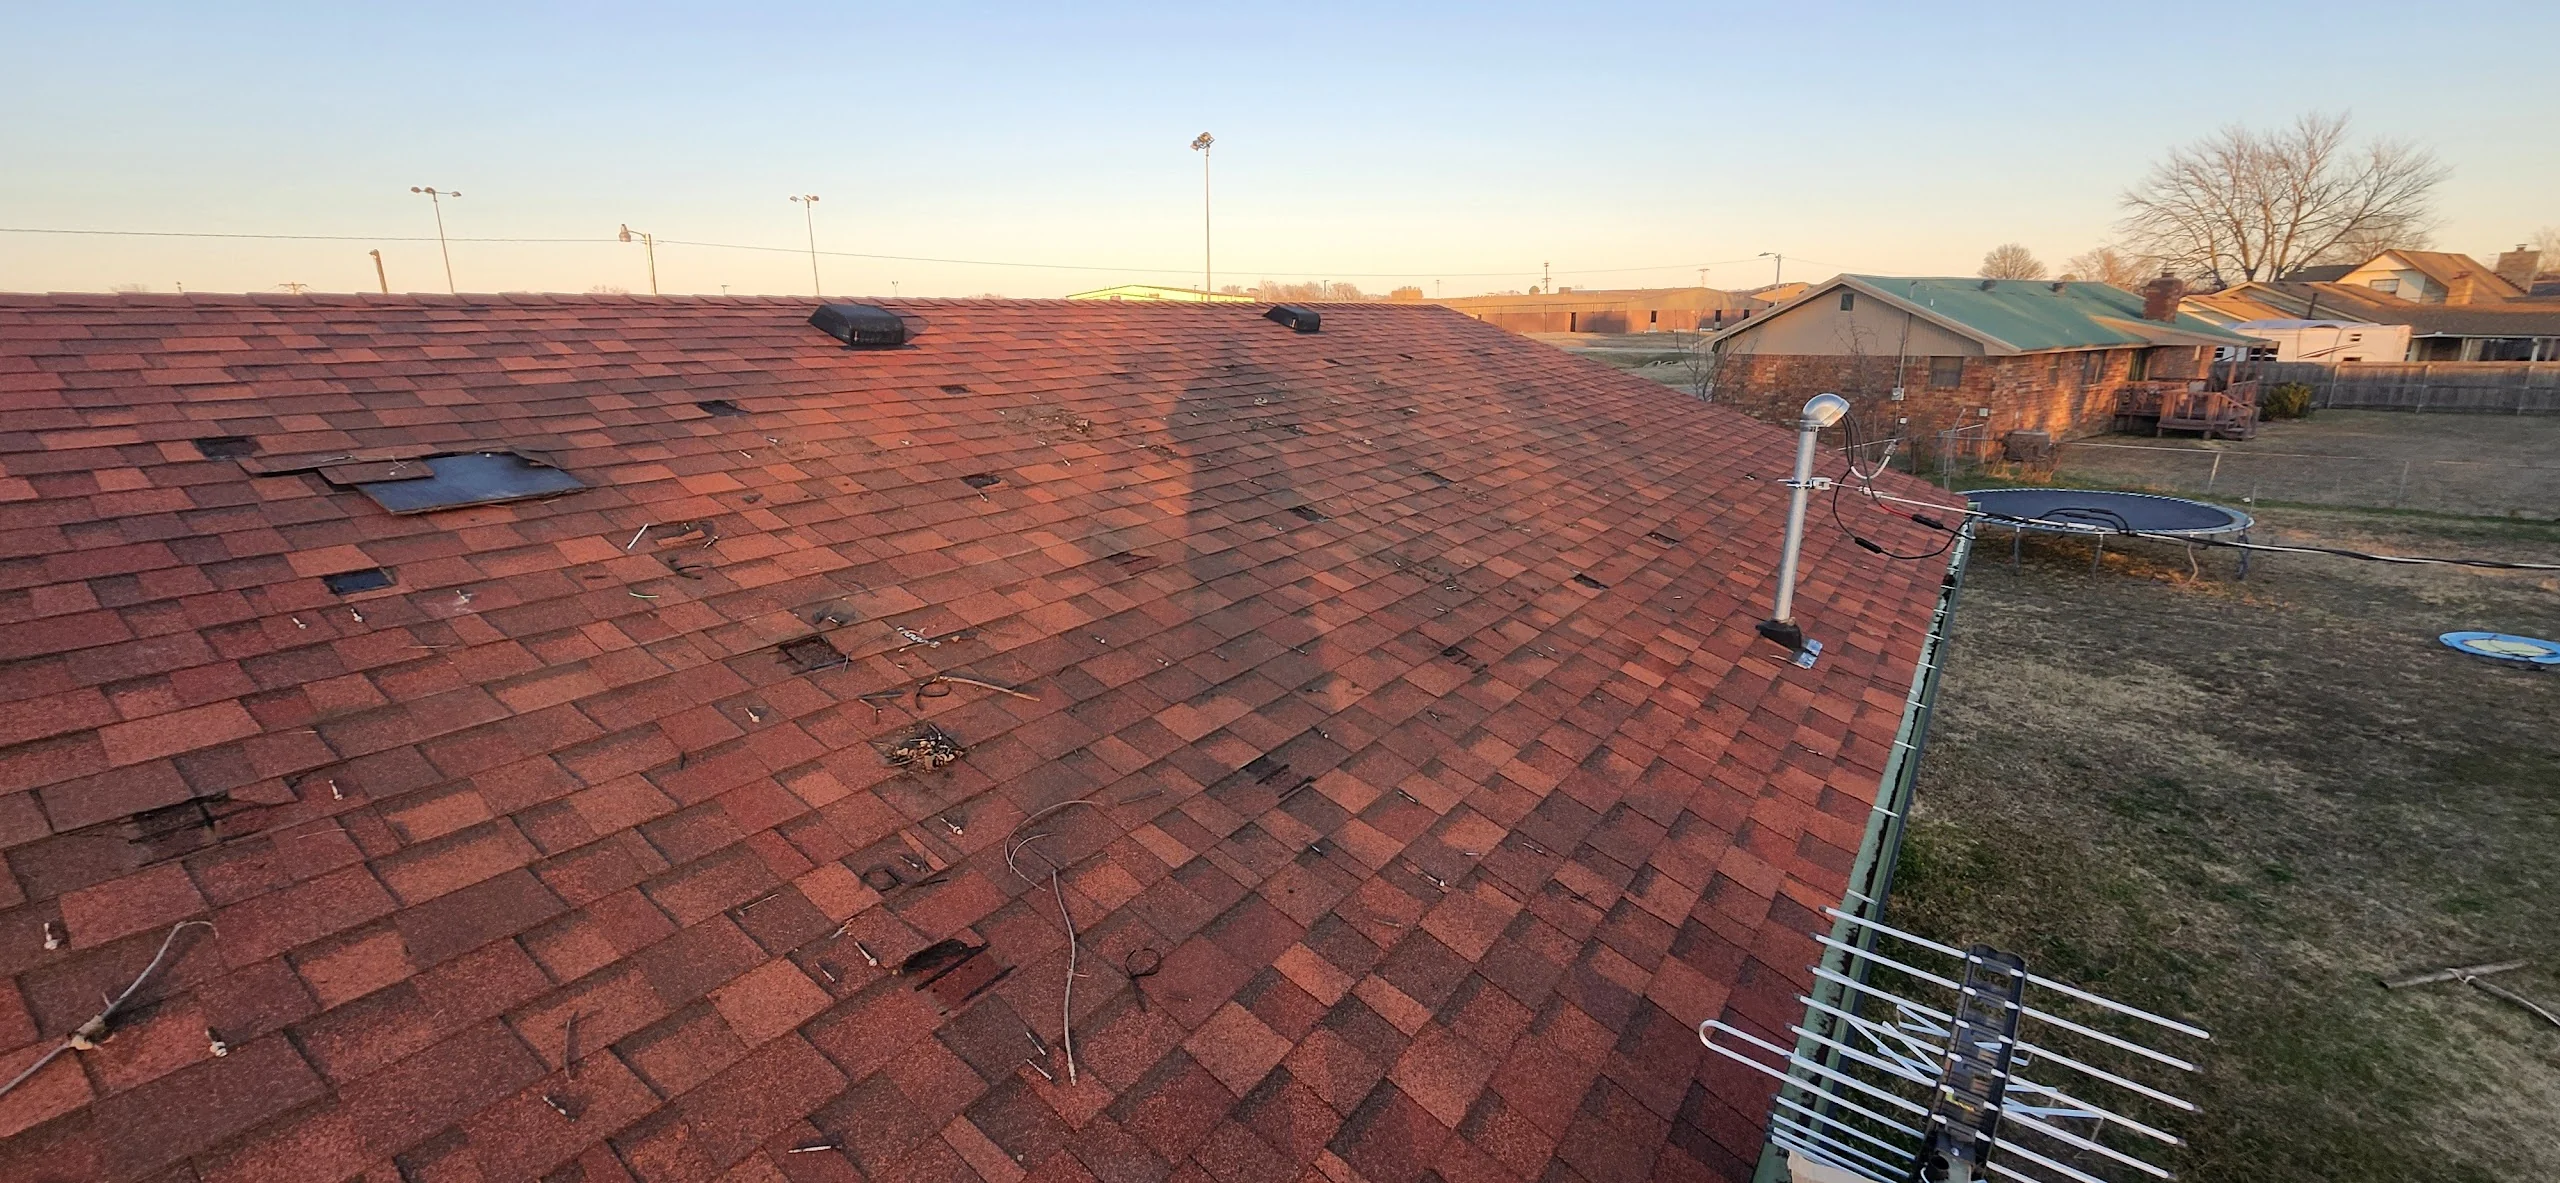
The piece of plywood over the hole is a non-concern as the roofing crew was scheduled only a few days later, and no rain was in the forecast.
Reinstalling the solar, honestly, would have lost money — it does not really add to the sale price of the home nearly as much as you would hope. Its only valuable to someone who knows what it is, and nobody is going to pay an extra 20 or 30,000 for the solar.
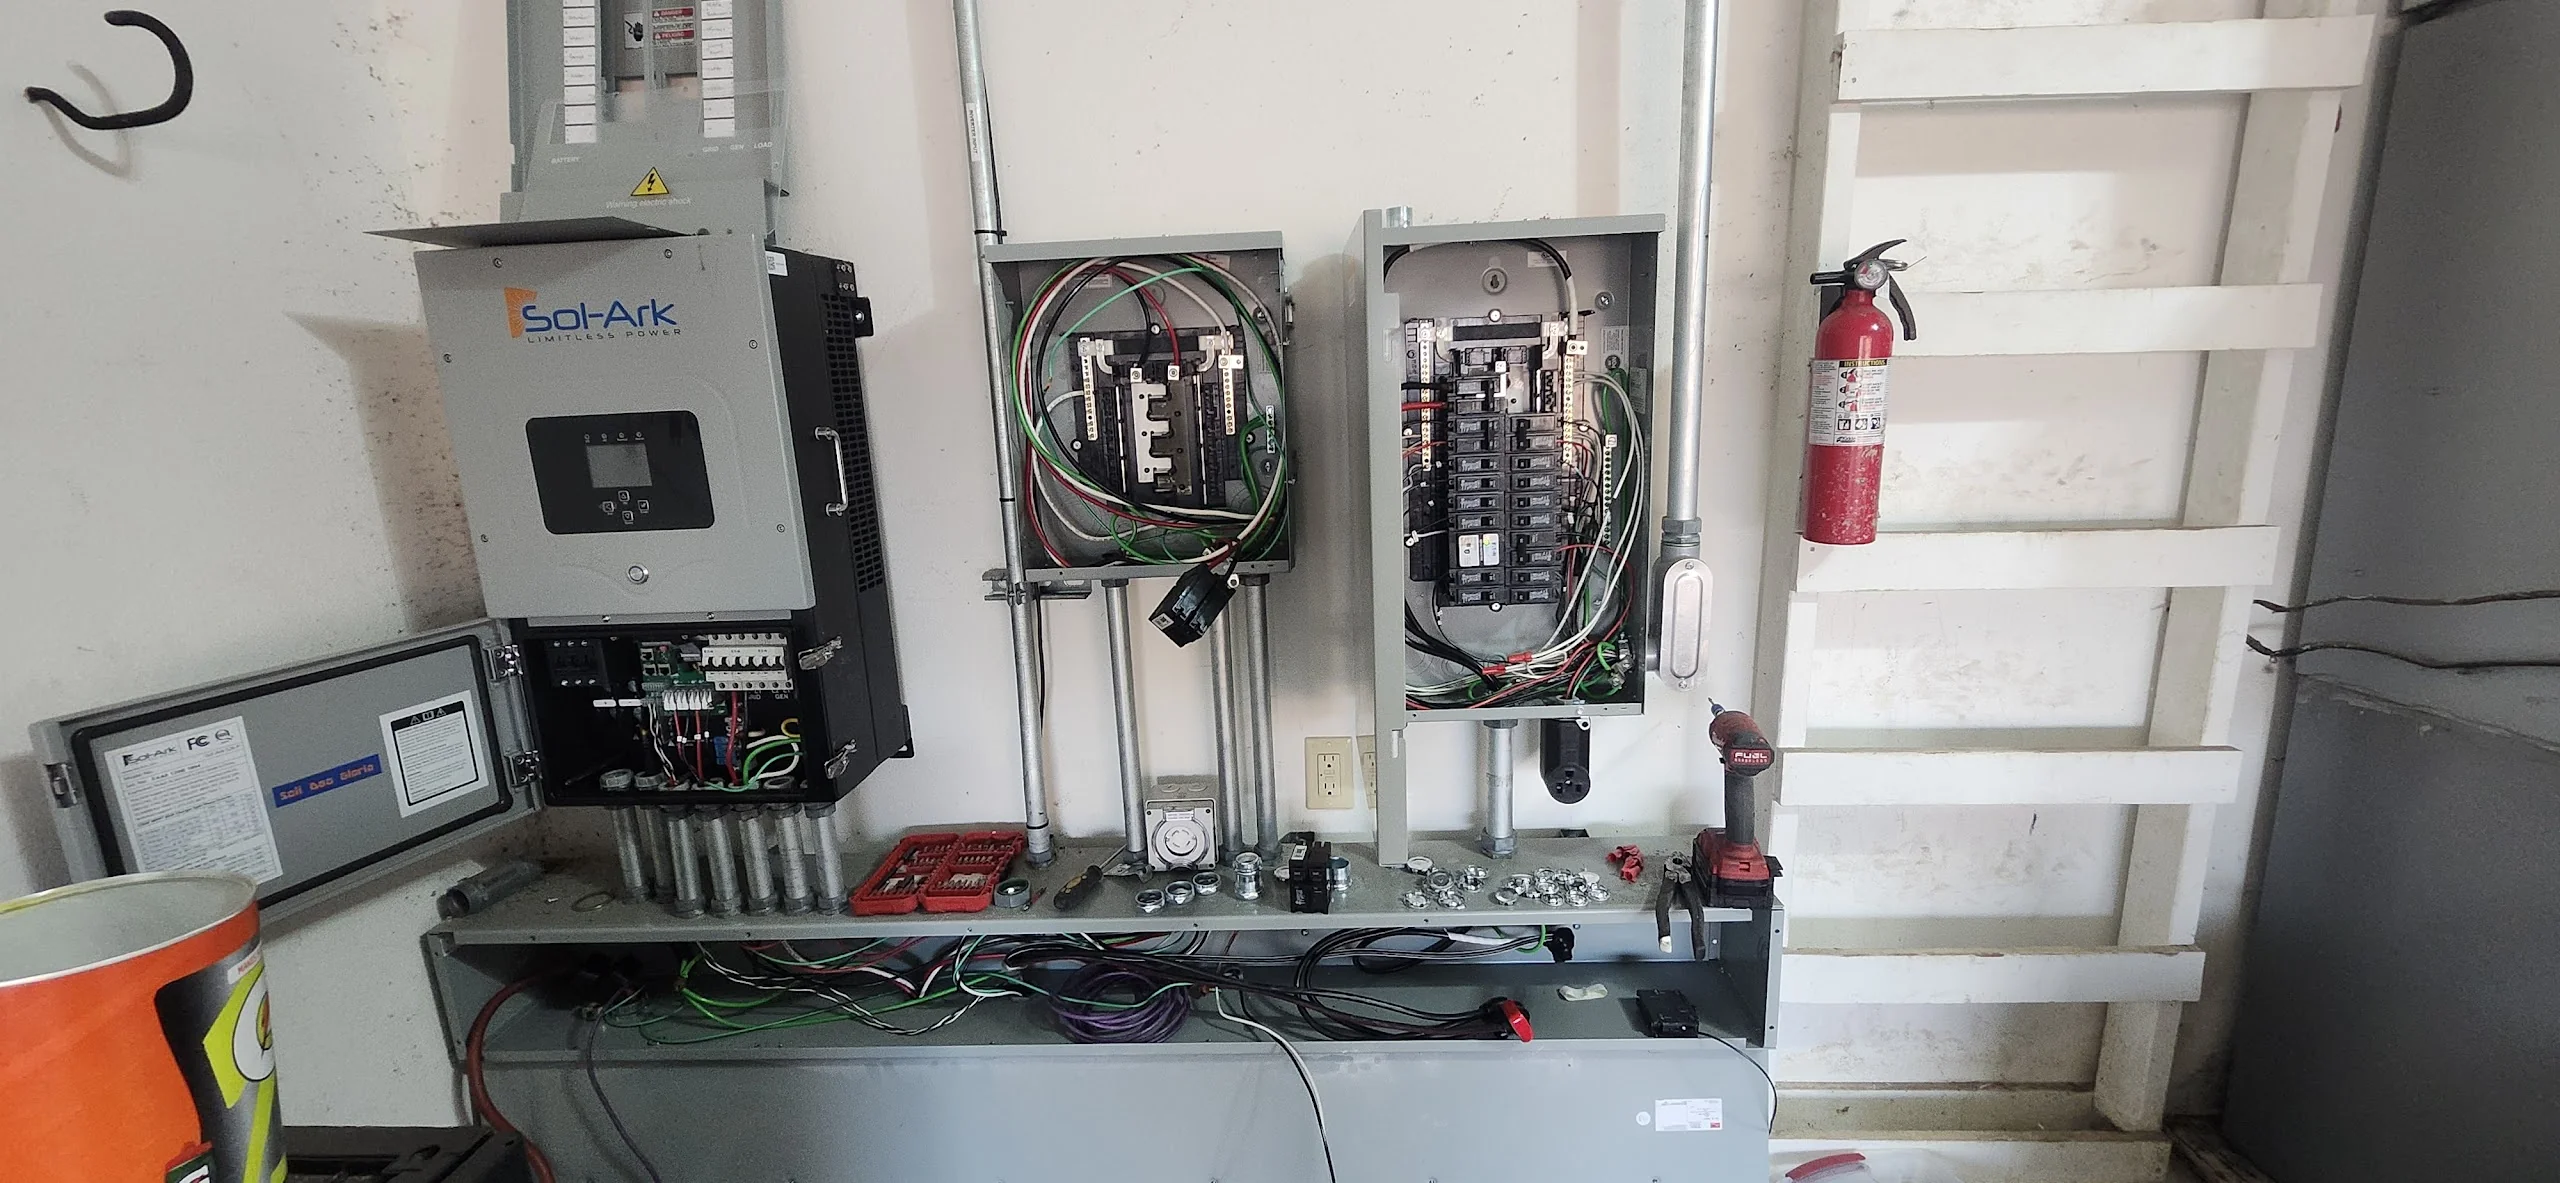
Tearing Down the Garage Hardware
So, logically, the next step was to start taking down all of the hardware in the garage.
Step one was to start removing the faces to the panels, to allow me to work. Not pictured — I had already removed the small box in the middle, which contained my monitoring hardware (Emoncms, Solar Assistant, etc.)
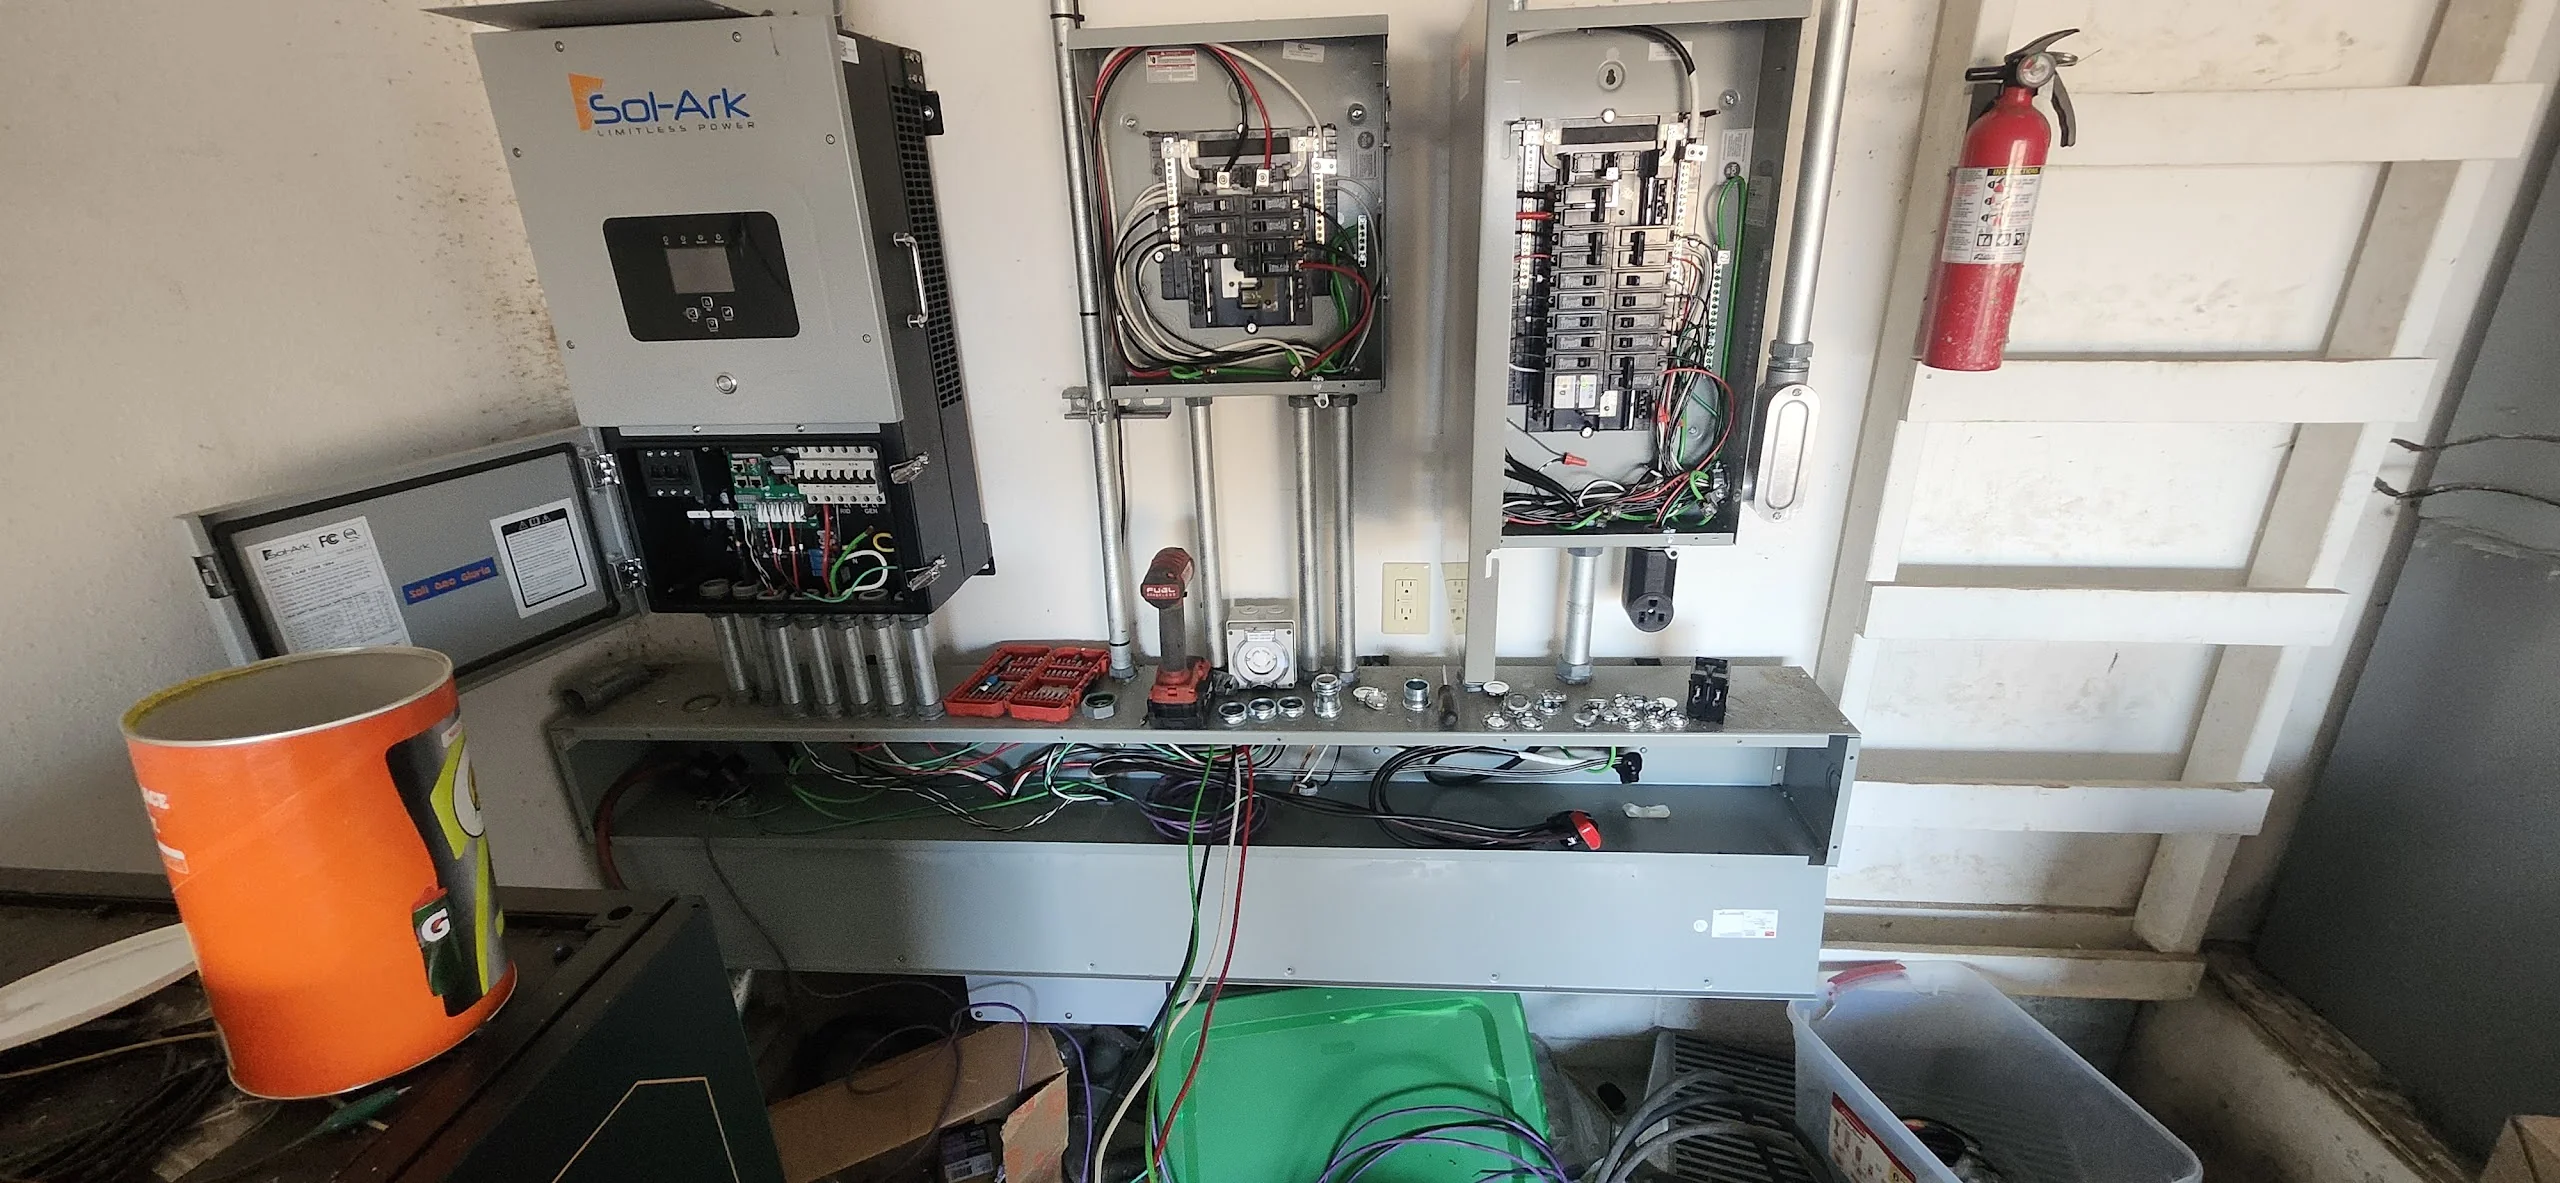
The goal here is to remove the inverter and the middle panel. The middle panel is my "Critical loads panel", which is fed directly from the inverter.
There is a 60 amp breaker here, which feeds into the "Generator" power of my automatic transfer switch, which back feeds the main panel on the right.
In addition, you will notice the wirenuts in the main panel — those are all for circuits which were moved to this backup panel. Moving the circuits was as easy as removing the wirenut and then attaching the load directly back into the panel.
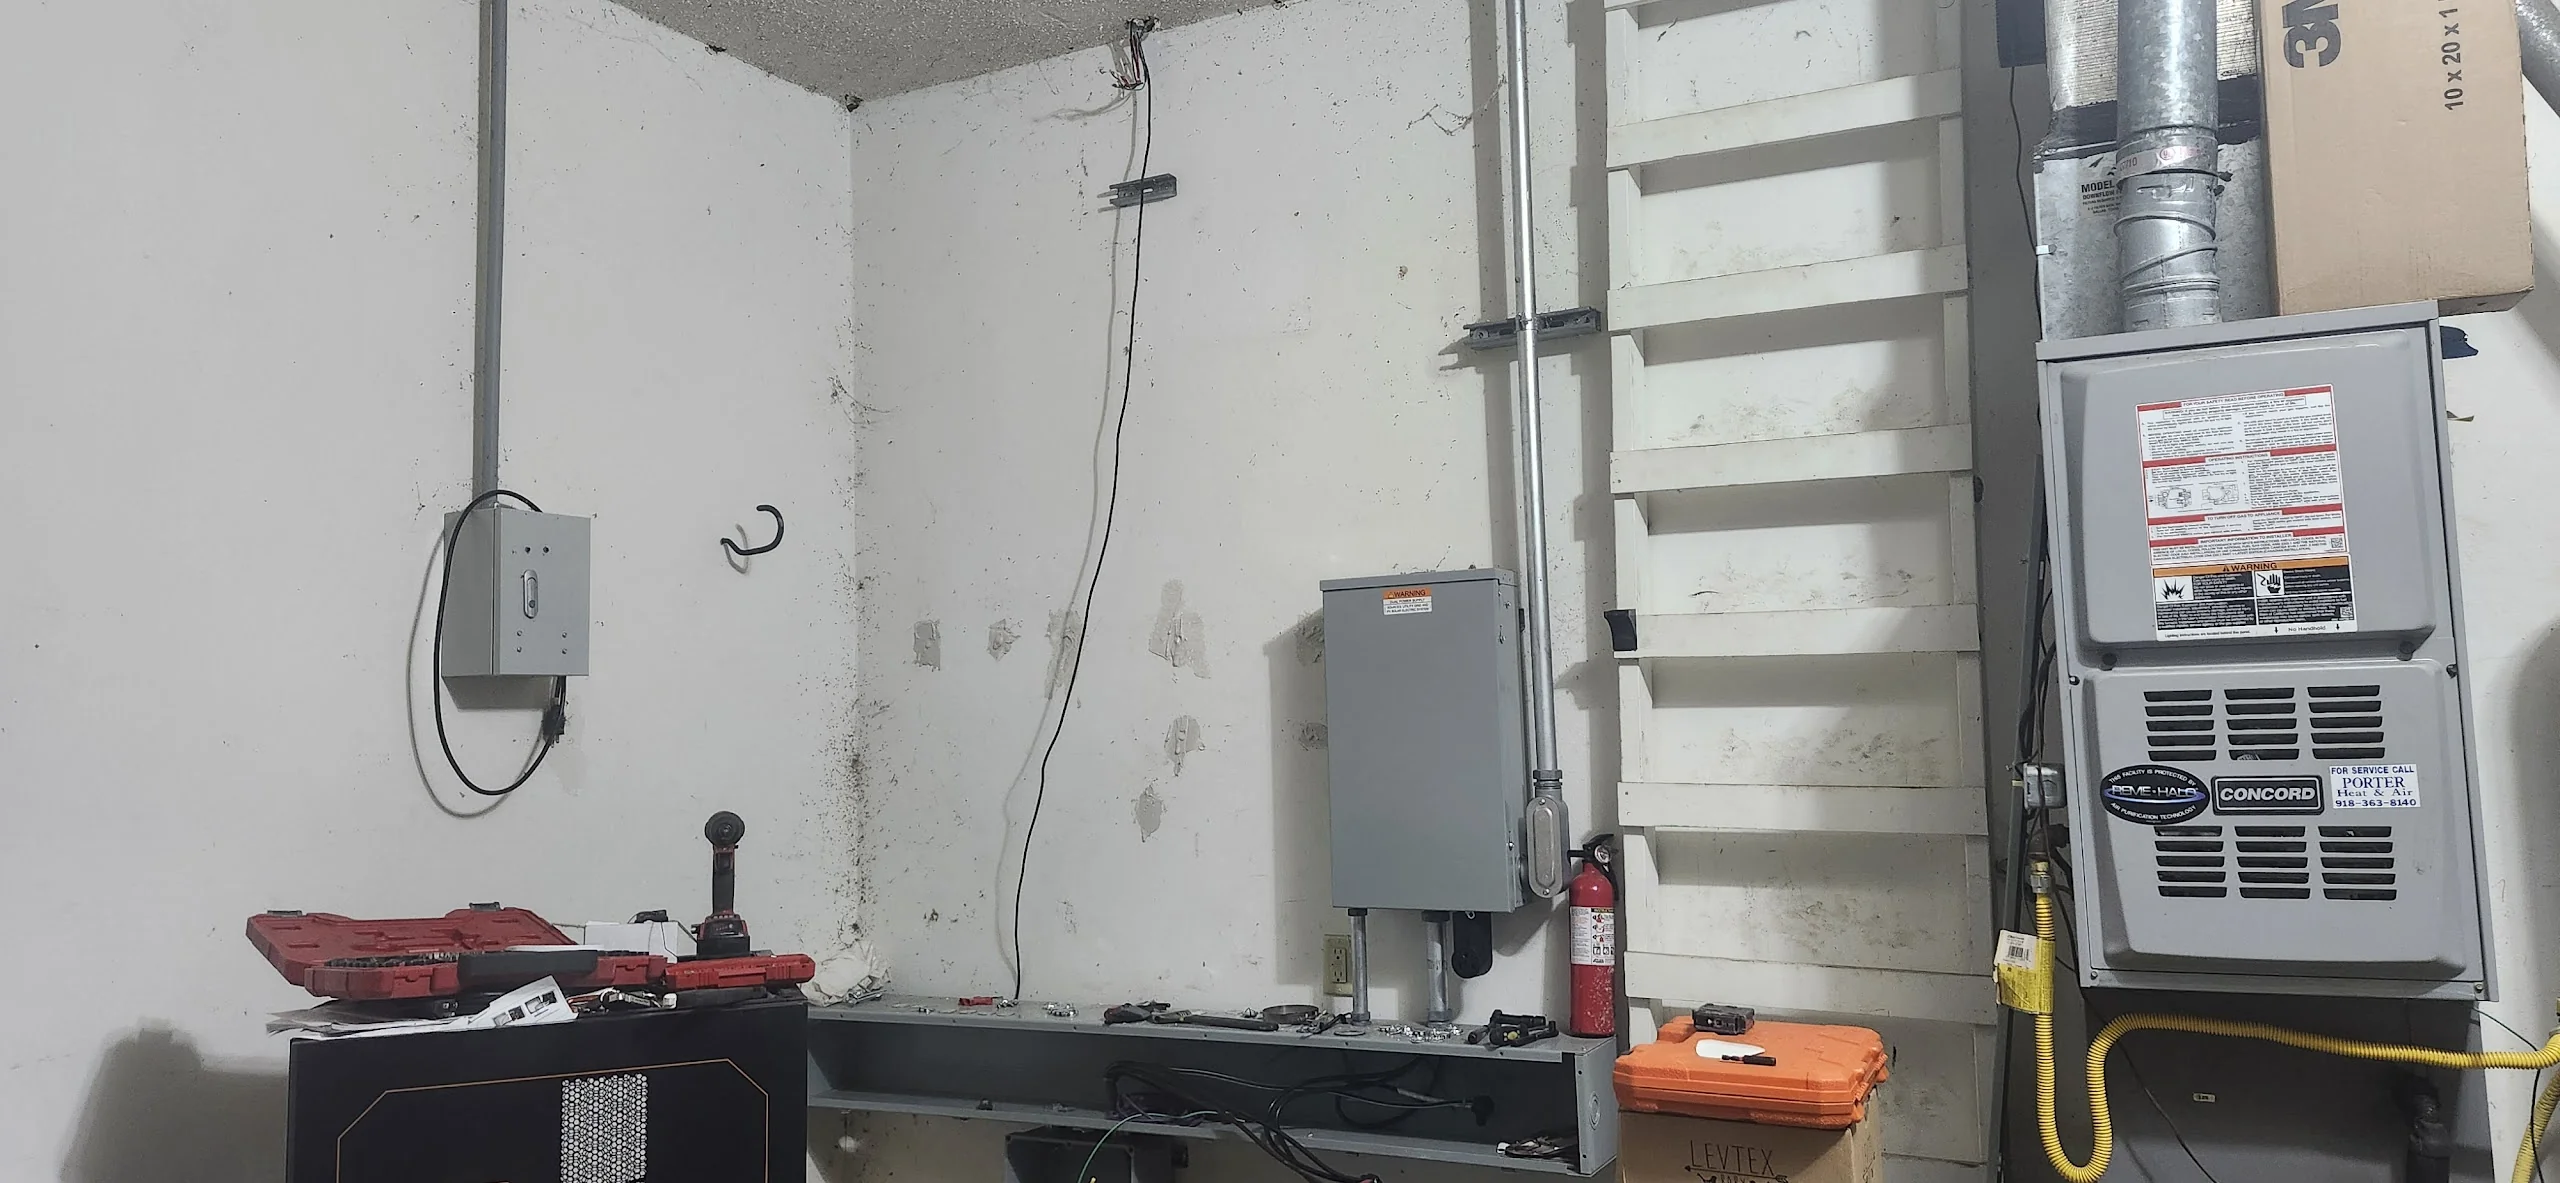
After a little while, that was done.
At this point, the middle panel is completely dead. And the inverter is completely dead.

A few days later, I was able to fully remove everything and get some drywall patch applied to where the strut channel had been.
Exterior Wall Hardware
Next up, I had a lot of hardware on the back of the house too, where the utility connection came in.
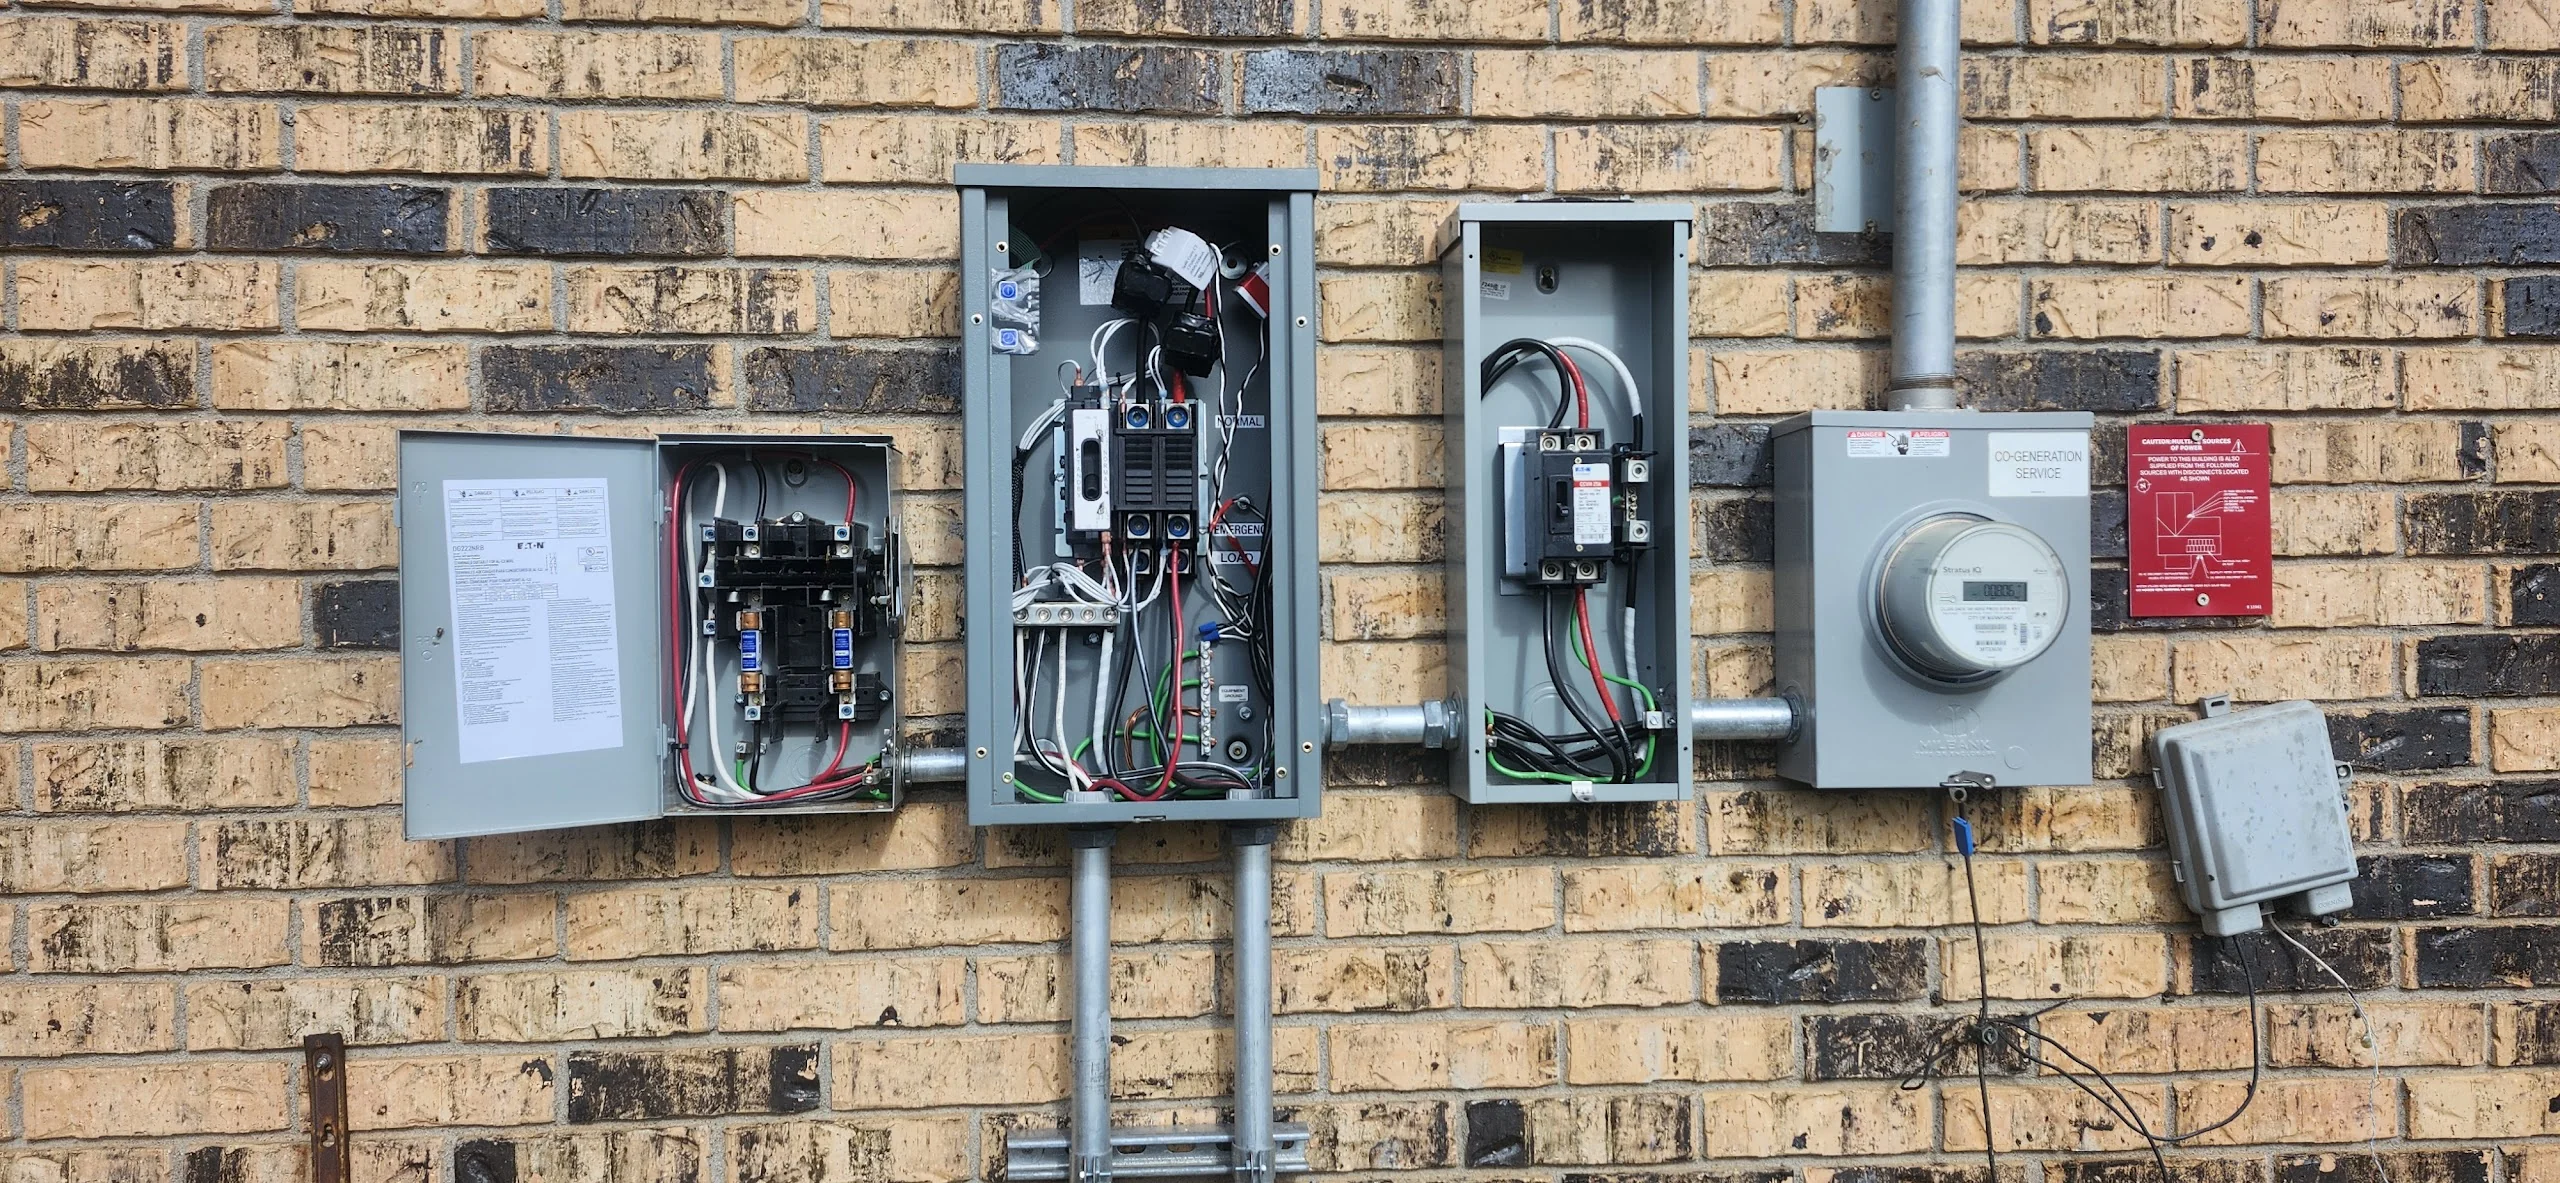
I decided to leave the main shutoff switch, as the utility meter did not have one — and having a main shut-off is rather important.
But, the transfer switch and the disconnect were both coming down.
And, voila. They are down.
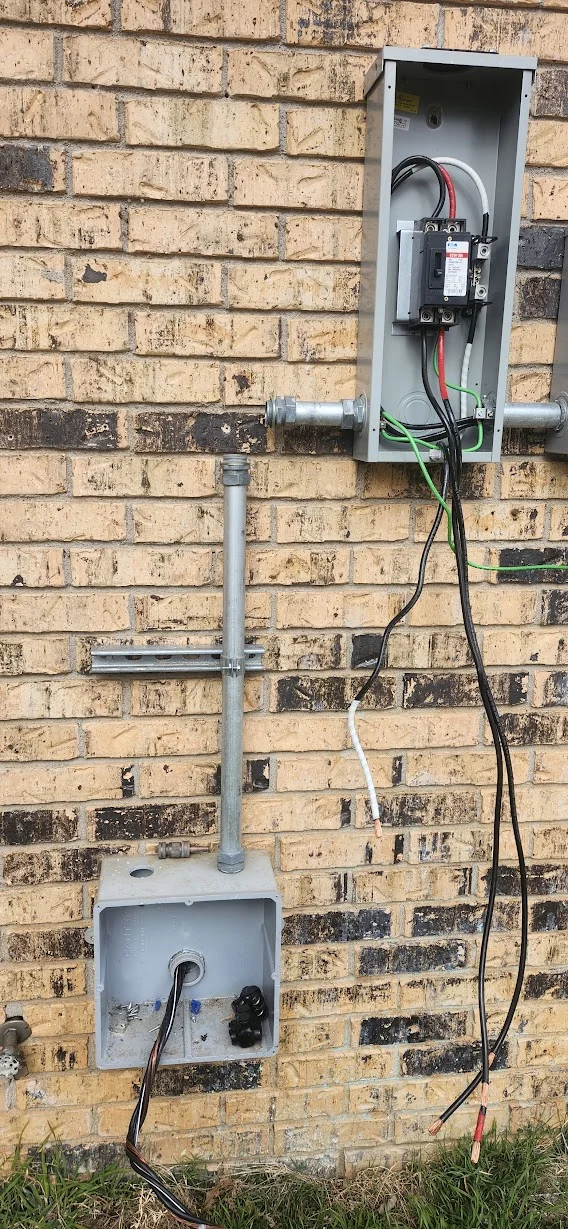
Not pictured — I did add a 90 to make a smooth transition from the bottom junction box to the shut-off switch.
What will happen to the hardware?
Well, don't worry — I have a plan for everything.
I used the Solark 12k at a solar install at my Dad's property. I designed a system which is currently 5kw PV (with 12kw of additional PV arriving in two days), and 32kwh of LiFePO4 storage. You may see a post on it soon.
Everything else is being used on my upcoming build, which is being announced at the same time you see this post. That includes:
- The 200 amp Eaton automatic transfer switch.
- Eaton outdoor panel (critical loads panel).
- Tigo optimizers.
- 5kw of solar panels.
- 20kwh of EG4 server-rack batteries.
- Nearly all of the wiring will be reused, either directly supporting my new solar install, or fixing the horrendous wiring in my new shop (and adding outlets for my welder / plasma torch).
Nothing will go to waste!